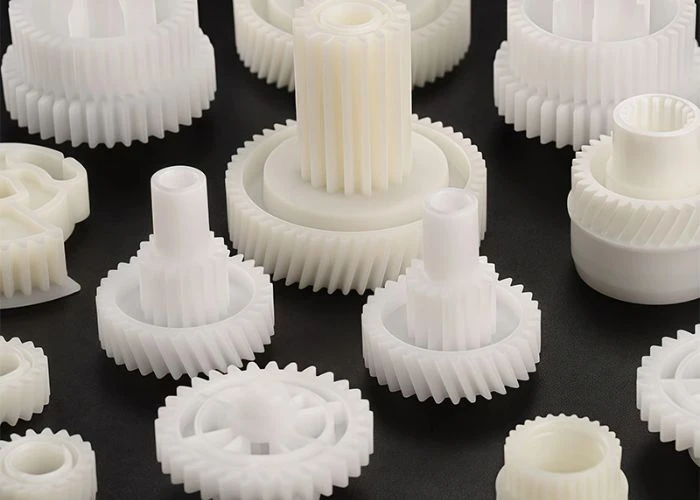

Complete prototype services bring multiple prototype manufacturing stages into one coordinated workflow, from individual plastic parts to a finished physical assembly. At UForProto, these services can combine CNC plastic machining, SLA/SLS 3D printing, vacuum casting, surface finishing, dimensional inspection, trial assembly, and final prototype assembly. Instead of managing each stage as a separate order, engineers can coordinate the manufactured parts, finishes, supplied components, and assembly requirements around one complete prototype build.
For engineers developing multi-part plastic products, complete prototype services provide a coordinated path from individual prototype parts to a fully assembled physical prototype.
What Do Complete Prototype Services Include?
Complete prototype services combine multiple manufacturing and finishing processes to turn individual components into a coordinated physical prototype. Depending on the design and development stage, a complete prototype may involve CNC plastic machining, 3D printing, vacuum casting, surface finishing, dimensional inspection, trial assembly, and final prototype assembly.
| Service | Role in a Complete Prototype |
| CNC Plastic Machining | Produces precision housings, structural parts, threads, and critical interfaces. |
| SLA/SLS 3D Printing | Produces complex geometries and supports fast design iterations. |
| Vacuum Casting | Produces multiple similar prototype parts or small prototype sets. |
| Surface Finishing | Adds painting, silk screening, UV coating, and other cosmetic finishes. |
| Dimensional Inspection | Verifies critical dimensions and mating features before assembly. |
| Trial Assembly | Checks fit, gaps, alignment, and installation conditions. |
| Prototype Assembly | Brings manufactured parts and supplied components together into a complete physical prototype. |
Complete Prototype Services Go Beyond Individual Part Manufacturing
Manufacturing an accurate prototype part answers questions about that component, but a multi-part product creates another set of manufacturing relationships. Complete prototype services extend the work from individual part quality into fit, appearance, assembly sequence, and the condition of the finished prototype.
When we inspect an individual CNC-machined housing, we can check its critical dimensions, openings, machined surfaces, threads, and other specified features. That inspection is necessary, but it does not tell us everything about the final product. A rear cover may also be within tolerance but sit slightly differently once fastening positions, internal supports, and neighboring components begin influencing the assembly.
The same applies to buttons, transparent windows, decorative panels, brackets, and removable covers. Their value in the prototype is determined not only by whether each part is manufactured correctly, but also by whether their positions, gaps, interfaces, and visible transitions remain appropriate when they are brought together.
This is why we treat a fully assembled prototype as another manufacturing stage rather than simply a larger order containing more parts. The purpose is to move from “Is each component manufactured correctly?” to “Do these manufactured components still form the product we intended when assembled?”
When Individual Prototype Parts Are No Longer Enough
Not every project needs to move immediately into a complete assembly. Individual parts remain useful when an engineer is checking a specific structure or revision. A fully assembled prototype becomes more valuable when decisions increasingly depend on relationships between several components rather than on one component alone.
A typical example is a product made from several exterior housings. Each panel can be checked individually, but the real cosmetic result appears only after the panels meet around the product body. Panel height, joint width, edge alignment, and transitions between surfaces become much easier to evaluate in assembled condition.
The same principle applies to user-operated structures. Measuring a button, lid, handle, removable tray, or access cover tells us whether the component itself is correct, but not necessarily how it feels or sits relative to surrounding parts. The installed position may reveal interference, insufficient clearance, an uneven gap, or an assembly relationship that was difficult to judge from separate components.
For engineering teams, this is usually the point at which complete prototype services become worthwhile: the next development decision requires product-level physical information rather than another isolated part.
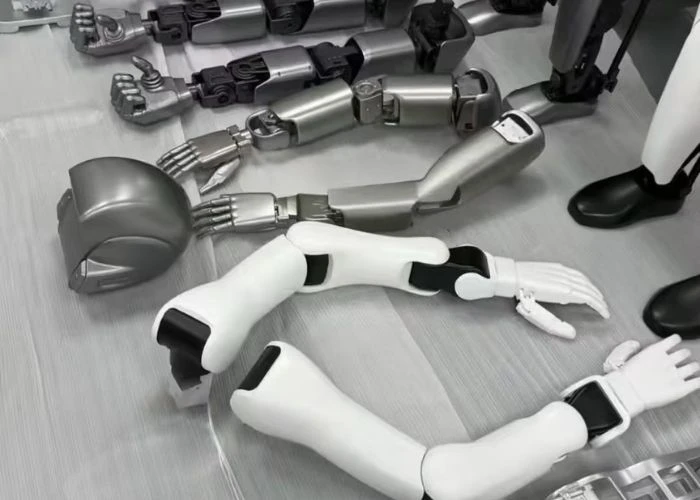
One Complete Prototype Does Not Mean One Manufacturing Process
A multi-part prototype rarely benefits from forcing every component into the same process. In our workshop, we select the manufacturing route at component level and then coordinate those different routes around the requirements of the finished assembly.
For engineering plastic housings, structural parts, threaded features, mounting areas, and components with important dimensional requirements, CNC plastic machining is often an appropriate route. Other parts may be better suited to SLA or SLS 3D printing when their geometry is difficult to machine or the design is still changing quickly.
Vacuum casting can become practical when the project requires several similar parts or multiple prototype sets. Standard hardware and customer-supplied components may then be integrated with those custom-manufactured parts during assembly.
The important decision is therefore not, “Which process should we use for the whole prototype?” Instead, we ask what each component needs to achieve and how its manufacturing route will affect the final assembly.
A single prototype may consequently combine CNC-machined plastic parts, 3D printed components, vacuum cast parts, fasteners, displays, and other supplied items. The value of complete prototype services is that these different components are coordinated toward one physical build instead of being treated as unrelated manufacturing orders.
Surface Finishing Must Be Planned for the Assembled Prototype
Once several prototype parts form one visible product, surface finishing can no longer be judged only part by part. Color, gloss, texture, printed graphics, panel transitions, and visible gaps interact across neighboring components, so the finished assembly becomes the real cosmetic reference.
Consider two painted housing sections. Each may look acceptable when inspected separately, yet once assembled side by side, a difference in gloss or surface texture can become much easier to notice. Even when the color specification is nominally the same, differences in underlying surface preparation or viewing angle can affect how adjacent panels appear as one product.
Printed graphics introduce another relationship. A silk-screened logo may be correctly positioned according to its individual drawing, but its visual relationship with a display window, button, panel edge, or another printed element becomes meaningful only after assembly.
For this reason, our surface-finishing work on a complete prototype is planned around which surfaces will be seen together. Primary cosmetic faces may require closer consistency, while hidden internal areas can remain focused on manufacturing and assembly requirements. This avoids spending the same finishing effort everywhere while still protecting the areas that define the final product appearance.
The objective is not simply to make every part look good independently. It is to make the relevant parts look intentional and consistent when the customer sees the assembled prototype as one product.
Trial Assembly Reveals What Individual Inspection Cannot
Dimensional inspection and trial assembly answer different questions. Inspection confirms whether a manufactured component meets its specified requirements; trial assembly shows how the dimensional, geometric, and installation relationships of several real components interact in the same physical build.
Tolerance Stack-Up and Mating Relationships
Every manufactured component has dimensional variation. A problem can therefore appear even when the individual parts being assembled are each within an acceptable range. What matters is how several dimensions accumulate along the same assembly chain.
Consider an outer housing, internal support, button module, and top cover. The individual dimensions may all pass inspection, but the installed position of the internal support influences the button, the button influences its relationship with the cover opening, and the final housing position determines the visible gap. The assembled result is created by the chain, not by one isolated dimension.
When trial assembly exposes a fit problem, we therefore do not immediately modify whichever component is easiest to reach. We first trace the relationship: Is the issue coming from a mating surface, a locating feature, cumulative dimensions, fastening position, or the actual supplied component?
That diagnosis matters because correcting the wrong part can solve one assembly temporarily while creating a new dimensional problem elsewhere. Trial assembly is useful precisely because it gives us a physical basis for deciding where the correction should occur.
Gaps, Alignment, and Assembly Access
Not every assembly problem is a tolerance issue. Multi-part prototypes also reveal whether visible panels align correctly, whether gaps remain consistent, whether fastening tools can reach their positions, and whether the planned assembly sequence is practical with real parts.
A screw boss, for example, may be correctly located according to CAD and dimensional inspection. But after a bracket, PCB, or neighboring housing is installed, the screwdriver approach may become restricted. The problem is not the screw-hole dimension; it is the physical installation condition created by the complete assembly.
Finished surfaces create another constraint. A removable panel may technically have enough clearance to install, but if it must be forced past a painted neighboring surface, the assembly route risks scratching or damaging the prototype. In that situation, we need to review the sequence, clearance, or local relationship rather than simply accepting that each part individually fits.
This is why we regard trial assembly as part of prototype manufacturing rather than an activity performed after manufacturing has already ended. The assembly itself generates manufacturing information that can guide necessary adjustment before the prototype is finalized.
Customer-Supplied Components Should Be Included in the Physical Build Early Enough
A fully assembled prototype often contains components that we do not manufacture: displays, PCBs, switches, motors, sensors, fasteners, lighting parts, or other standard hardware. Their physical condition can influence the prototype just as much as the custom plastic parts surrounding them.
Our role is not to redesign the customer’s electronics or provide complete-machine functional testing. Instead, we use the confirmed component information to prepare the surrounding prototype parts and support their mechanical integration into the physical assembly.
Whenever possible, actual supplied components are more useful than simplified representations alone. A display module may have a connector or cable exit that was simplified in CAD; a PCB may include a local component height that affects nearby clearance; standard hardware may differ slightly from the nominal dimensions assumed during early design.
Introducing these real components before the prototype is completely finished allows us to evaluate their physical relationship with the manufactured plastic parts while there is still an opportunity to correct a mechanical issue.
For complete prototype services, the important point is not that one manufacturer must produce every component. It is that the relevant components—manufactured or supplied—are considered together when they affect the final physical build.
A Practical Workflow From CAD Files to a Fully Assembled Prototype
A complete prototype does not move through manufacturing as a simple sequence of unrelated operations. Before production begins, we need to understand how the individual parts will eventually come together, because material choice, manufacturing method, surface requirements, supplied components, and assembly relationships can all affect one another. The workflow therefore needs to be planned around the finished prototype rather than around separate manufacturing tasks.
Part Manufacturing Is Planned Around the Final Assembly
We begin by reviewing the CAD files, component structure, materials, required quantity, critical interfaces, visible surfaces, and available assembly information. Different parts can then be assigned to CNC plastic machining, SLA/SLS 3D printing, vacuum casting, or another suitable route according to what each component needs to achieve in the final build.
This does not mean we manufacture every part first and only think about assembly afterward. If a housing contains a critical mating edge, that relationship needs to be understood before CNC machining. If two exterior panels must appear consistent after assembly, the later surface requirement can influence how their base surfaces are prepared. If a customer-supplied display or PCB occupies a tightly controlled installation area, its real size and interface condition may also affect the surrounding plastic parts.
After individual parts are produced, we carry out the necessary inspection and hand preparation before they move into the next stage. Surface finishing is also handled according to the role of the part within the complete prototype. Cosmetic areas may require painting, silk screening, UV coating, electroplating, or other suitable treatments, while important mating surfaces need to remain protected so that appearance work does not create a new assembly problem.
Trial Assembly Creates Feedback Before the Prototype Is Finalized
Trial assembly is where the separate manufacturing routes begin to become one prototype. At this stage, we bring together the manufactured plastic parts, standard hardware, and customer-supplied components and review their actual fit, alignment, visible gaps, fastening conditions, and installation sequence.
The important point is that trial assembly is not simply a final confirmation step. If an issue appears, we first trace it back to the relevant relationship before deciding what should be adjusted. A gap problem may come from one housing, a cumulative dimension across several parts, a finishing-related change, or the actual size of a supplied component. Correcting the wrong part can temporarily improve one area while creating another problem elsewhere.
For this reason, the workflow needs to allow information to move backward as well as forward. A trial assembly may send one component back for a local correction; an assembly interface may need additional protection during finishing; or a real supplied component may show that a neighboring plastic feature needs minor adjustment. Once these relationships are confirmed, the relevant parts can be rechecked and the prototype completed as a final assembly for customer evaluation.
This feedback loop is what makes complete prototype services different from simply ordering machining, finishing, and assembly separately. The value comes from keeping the manufacturing stages connected until the finished prototype reaches the required physical condition.
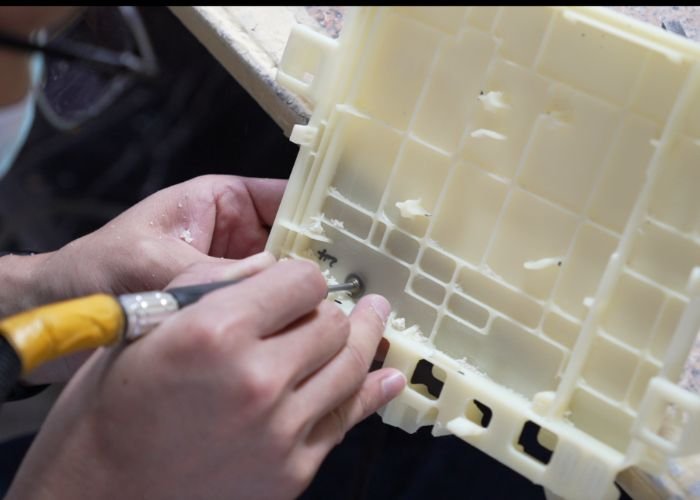
What Engineers Should Confirm Before Ordering Complete Prototype Services
A complete prototype does not require an unnecessarily complicated RFQ, but the manufacturer needs enough information to understand which relationships matter after assembly. The most useful project information is therefore the information that changes how the parts should be manufactured, finished, or brought together.
| Project Information | Why It Matters |
| 3D CAD Files | Defines components and their assembly relationships |
| Required Quantity | Helps plan manufacturing and repeated prototype sets |
| Material Requirements | Supports process planning for individual components |
| Critical Dimensions | Identifies important mating and installation relationships |
| Surface Requirements | Defines which components must appear consistent together |
| Assembly Information | Clarifies interfaces, fastening, and installation sequence |
| Customer-Supplied Parts | Allows the build to reflect actual physical components |
| Evaluation Purpose | Defines what the fully assembled prototype needs to demonstrate |
We do not recommend adding specifications simply to make the documentation appear more detailed. If a requirement does not change manufacturing, finishing, inspection, or assembly, it may not need the same level of emphasis as a critical interface or visible product surface.
Clear priorities are more useful than excessive information. They allow us to concentrate manufacturing control where it affects the final prototype instead of applying the same standard to every surface and every dimension.
Complete Prototype Services Reduce Multi-Supplier Coordination
As more manufacturing stages are added to a prototype, the challenge is no longer only making the parts. Engineering and purchasing teams also need to keep CAD revisions, finishing requirements, supplied components, and assembly feedback synchronized between different activities.
Suppose one supplier machines a housing, another completes painting, and a third performs assembly. If the final panel gap is incorrect, the engineering team may need to determine whether the source is the machined geometry, coating buildup, another component, or the assembly relationship. Each supplier sees only part of the manufacturing history.
When the relevant stages are managed through one complete prototype workflow, the same problem can be traced against the manufacturing information already associated with the build. The objective is not to claim that one supplier automatically eliminates every issue; it is to shorten the path between finding a problem and identifying the stage that created it.
This becomes increasingly useful as the number of parts, finishes, revisions, and assembly relationships grows. Purchasing teams have fewer disconnected orders to coordinate, while engineers gain a clearer manufacturing history for the actual prototype being evaluated.
That is a more practical benefit of complete prototype services than simply describing them as “one-stop manufacturing.”
When Does a Fully Assembled Prototype Add the Most Value?
A fully assembled prototype requires more coordination than an individual part, so it should be used when product-level information can influence the next development decision. Building a complete prototype too early may add work before the design relationships are stable; waiting too long may leave important assembly issues undiscovered.
One useful stage is multi-part fit evaluation. Once the major housings, covers, brackets, and installation structures have become reasonably stable, physical assembly can reveal interactions that are difficult to judge from separate parts.
Another is complete cosmetic review. When color, surface texture, printed graphics, panel gaps, and overall product appearance become important, an assembled prototype provides a more representative reference than several separate cosmetic samples.
A complete prototype can also provide useful physical information before a project moves toward a low-volume development stage. At this point, the goal is not to claim that the prototype is production-ready or to replace formal product validation. The value is to understand whether the current manufactured parts, interfaces, appearance, and assembly condition are sufficiently resolved for the engineering team to make the next decision.
Complete Prototype Manufacturing at UForProto
At UForProto, we are a direct plastic prototype manufacturer rather than a trading company. Our role in a complete prototype project is to connect the manufacturing stages needed to turn individual components into a usable physical assembly, rather than simply adding as many services as possible.
Our core work remains plastic prototyping. Depending on the project, we can combine CNC plastic machining, SLA/SLS 3D printing, vacuum casting, hand finishing, surface finishing, trial assembly, inspection, and final prototype assembly. Customer-supplied components and standard hardware can also be incorporated when they are required for the physical build.
The scope remains manufacturing-focused. We support mechanical preparation, component fit, prototype appearance, and assembly; we are not positioning this service as electronic product development or complete-machine functional testing. This keeps the work aligned with what we actually control as a prototype manufacturer.
For us, complete prototype services means connecting the manufacturing stages that genuinely matter to the project so that a group of individual components can become a coherent, reviewable physical prototype.
Conclusion
Complete prototype services become valuable when engineering decisions depend on how multiple parts work together rather than on individual components alone. By coordinating part manufacturing, surface finishing, trial assembly, inspection, and final assembly, we can identify fit, alignment, appearance, and integration issues earlier in the physical build. For projects moving from separate parts toward a fully assembled prototype, you can send us your CAD files, assembly information, quantities, and finishing requirements for manufacturing review and quotation.
FAQs
1. What Are Complete Prototype Services?
Complete prototype services connect individual part manufacturing with finishing, component preparation, trial assembly, inspection, and final prototype assembly. The exact scope depends on what the physical prototype needs to demonstrate rather than following one fixed service package.
2. What Is the Difference Between a Prototype Part and a Fully Assembled Prototype?
An individual prototype part mainly confirms that component’s geometry, dimensions, and manufactured features. A fully assembled prototype adds information about fit, alignment, gaps, appearance, installation, and the physical relationships between several components.
3. Can Different Manufacturing Processes Be Used in One Complete Prototype?
Yes. A complete prototype may combine CNC-machined plastic parts, SLA/SLS 3D printed components, vacuum cast parts, standard hardware, and customer-supplied components. We select the process according to each component rather than forcing the entire product into one manufacturing method.
4. Why Is Trial Assembly Important in Complete Prototype Services?
Trial assembly can reveal tolerance stack-up, alignment, gap, fastening, and installation-access problems that may not appear during individual part inspection. It also helps us trace a problem to the relevant interface before making unnecessary changes to another component.
5. Can Customer-Supplied Components Be Integrated Into the Prototype?
Yes. Displays, PCBs, switches, motors, fasteners, and other supplied components can be incorporated when the required parts and assembly information are available. Our work focuses on their mechanical integration with the manufactured prototype rather than electronic development or complete-machine functional testing.
6. What Should I Provide for a Complete Prototype Project?
We recommend providing 3D CAD files, quantities, material requirements, critical dimensions, surface requirements, assembly information, and details of customer-supplied components. It is also useful to explain what the assembled prototype is intended to evaluate so manufacturing priorities can be set correctly.
7. What Manufacturing Processes Are Used for Complete Prototype Services?
CNC + SLA/SLS + Vacuum Casting + Surface Finishing + Assembly。
8. How Long Does It Take to Build a Complete Prototype?
Lead time depends on part quantity, manufacturing processes, surface finishing, supplied components, and assembly complexity.