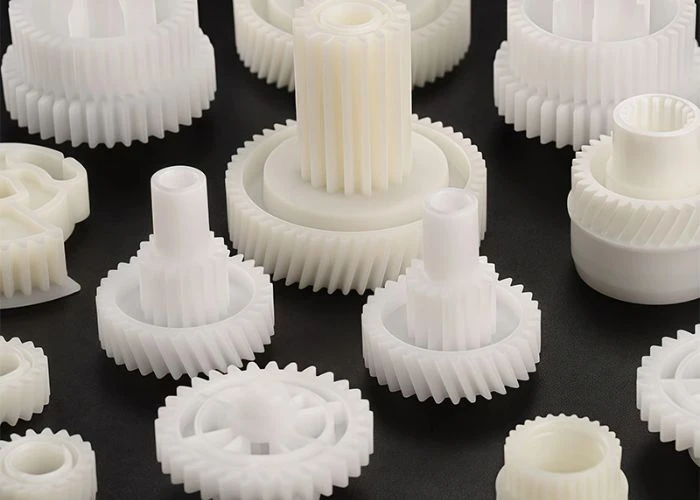

Vacuum casting can produce detailed, production-like prototype parts, but the process is not automatically defect-free. In my experience with plastic prototyping, vacuum casting defects such as bubbles, voids, incomplete filling, warpage, flash, and surface imperfections usually develop from several connected factors rather than one isolated mistake. Part geometry, master pattern quality, silicone mold preparation, resin handling, casting conditions, and curing can all influence the final result. Understanding where these defects originate makes it easier to prevent them before they affect appearance, dimensions, assembly, or low-volume prototype consistency.
Understanding Where Vacuum Casting Defects Begin
A vacuum casting defect does not necessarily begin when resin enters the silicone mold. I look at the entire manufacturing chain because problems introduced during CAD preparation, master pattern production, mold making, casting, or curing can remain hidden until the finished prototype is removed from the mold.
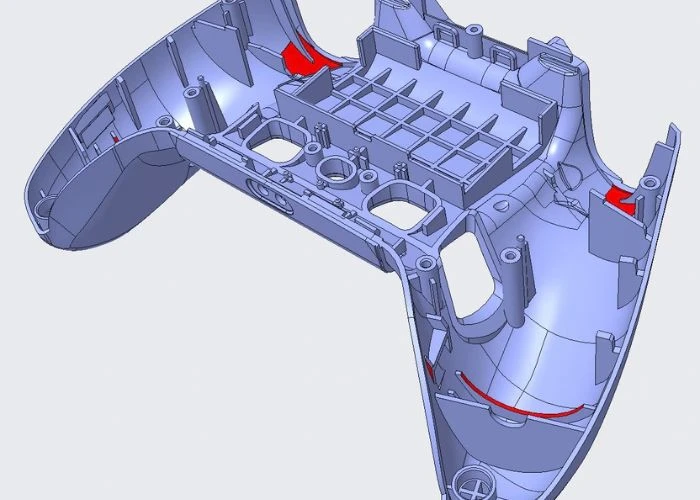
The process begins with the part geometry. Deep enclosed features, large flat surfaces, uneven sections, and difficult flow paths can create locations where air is harder to evacuate or where shrinkage is less uniform. These characteristics do not guarantee a defect, but they affect how the mold and casting strategy should be planned.
The master pattern is equally important because the silicone mold reproduces what it receives. Tool marks, scratches, poor transitions, or unwanted surface imperfections on a CNC machined or 3D printed master can appear again on every casting made from that mold. This is one reason master pattern preparation should be treated as part of quality control rather than just an intermediate step.
After the mold is created, gate location, venting, resin preparation, vacuum conditions, curing, and demolding become the next major variables. Research on vacuum casting defects has shown that bubbles can remain even after degassing if trapped air does not have an effective escape path, making vent location particularly important.
The Most Common Vacuum Casting Defects in Prototype Parts
Different defects point to different stages of the manufacturing process. Instead of treating every visible problem in the same way, I separate vacuum casting defects into groups according to what they reveal about resin flow, curing behavior, mold condition, and final part geometry.
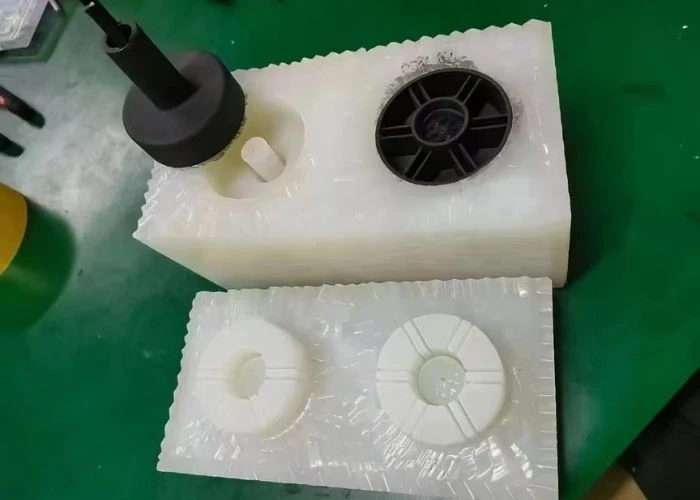
Bubbles, Voids, and Incomplete Filling
Bubbles are among the most recognizable vacuum casting defects. They may appear as small pinholes on the surface, visible bubbles in transparent parts, or internal voids that are difficult to detect from the outside. Air can enter during resin mixing or remain trapped in areas where the mold does not vent effectively.
Vacuum degassing reduces this risk, but it should not be viewed as an automatic guarantee. Vent design, resin viscosity, filling path, mold geometry, and moisture conditions all matter. Published experimental work found that additional vents helped eliminate bubbles that remained despite degassing, while insufficient degassing and wet tools increased bubble formation.
Incomplete filling, sometimes described as a short shot, is closely related to the same flow problem. If resin cannot reach a narrow feature or trapped air occupies the end of a cavity, small details may not form completely. Thin ribs, blind pockets, narrow channels, and distant flow-end features deserve particular attention during mold planning.
Shrinkage, Sink Marks, and Warpage
Polyurethane casting resin changes as it cures, so the geometry of a finished casting is influenced by more than the dimensions of the master pattern. Resin behavior, wall distribution, mold support, temperature, and curing conditions can all contribute to dimensional change.
Localized thick areas can cool and cure differently from neighboring thin regions. Bosses, ribs, intersections, and sudden changes in section thickness can therefore become locations where sink marks or visible surface read-through are more likely to appear.
Warpage is more significant because it can affect the entire shape of a prototype. Large flat surfaces, thin unsupported sections, asymmetric geometry, uneven wall distribution, or premature demolding can all make distortion more noticeable.
In a multi-part prototype, I pay particular attention to this defect because a small amount of distortion may appear acceptable when a component is inspected alone but become obvious during trial assembly. It can create uneven gaps, shifted mating surfaces, or misalignment between neighboring housing parts.
Surface Defects, Flash, and Parting-Line Problems
Surface quality is particularly important when vacuum casting is used for cosmetic prototypes or parts that later receive painting, silk screening, or other surface finishing. Small defects beneath the final finish can remain visible even after additional cosmetic work.
Flow marks, dull areas, scratches, or local surface irregularities may originate from resin flow, mold surface condition, the master pattern, or handling after demolding. This is why I inspect both the casting and the surfaces that created it rather than trying to correct every problem only during hand finishing.
Flash typically appears along the silicone mold parting line when a small amount of resin enters the mold interface. Experimental defect analysis has also observed flash along the parting line and found that light flash could be removed during deflashing without affecting the tested part’s dimensional accuracy.
This illustrates an important point: not every visible vacuum casting defect has the same engineering significance. Some primarily affect appearance and finishing workload, while others can change dimensions, assembly, or the ability of the prototype to support meaningful testing.
Cosmetic Defects and Functional Defects Affect Prototypes Differently
For engineering teams, identifying a defect is only the first step. I also consider whether that defect changes what the prototype is intended to demonstrate. A cosmetic surface mark and a warped assembly interface should not automatically receive the same engineering priority.
| Vacuum Casting Defect | Typical Appearance | Main Concern | Possible Prototype Impact |
| Bubbles / Voids | Pinholes or internal cavities | Trapped air | Appearance or local structure |
| Incomplete Filling | Missing or incomplete features | Resin flow | Fit or function |
| Sink Marks | Local depressions | Uneven curing or section thickness | Cosmetic quality or local dimensions |
| Warpage | Bent or distorted geometry | Uneven shrinkage or stress | Assembly and dimensional alignment |
| Flow Marks | Surface lines or variation | Resin flow or mold condition | Cosmetic appearance |
| Flash | Thin excess material near parting line | Mold interface | Finishing or assembly |
| Mold Degradation | Loss of detail or rougher surface | Silicone mold wear | Batch consistency |
For an appearance prototype, a small surface imperfection may justify refinishing even when dimensions remain acceptable. For an engineering prototype, a dimensional deviation around mounting or mating areas may require more attention even if the surface still looks good.This approach prevents teams from treating prototype inspection as a simple pass-or-fail exercise. The acceptance criteria should reflect what the prototype is meant to evaluate.
Prototype Geometry Can Increase the Risk of Casting Defects
Some vacuum casting problems are strongly connected to the geometry of the part. I do not treat this as a general product-design lesson; instead, I focus on features that directly influence resin flow, air evacuation, curing behavior, mold support, and demolding during plastic prototyping.
Uneven wall distribution is one example. A part that contains sudden transitions between thin and thick sections can create different curing behavior across neighboring areas. Depending on the structure, this may increase the possibility of sink marks, localized dimensional change, or visible read-through.
Deep or partially enclosed cavities create another challenge because air needs a practical route to escape as resin enters the mold. If the feature becomes a natural air trap, mold orientation, venting, or filling strategy may need to be adjusted.
Large flat surfaces can make small changes in shape much easier to notice, while unsupported thin sections may be more sensitive during curing and demolding. Complex ribs and bosses can also create localized material accumulation that changes how surrounding areas cure.
For this reason, I evaluate geometry together with the casting process rather than relying on one universal wall-thickness or feature-size rule. Resin system, component size, mold arrangement, and prototype purpose all influence the final manufacturing decision.
Silicone Mold Design and Condition Influence Defect Formation
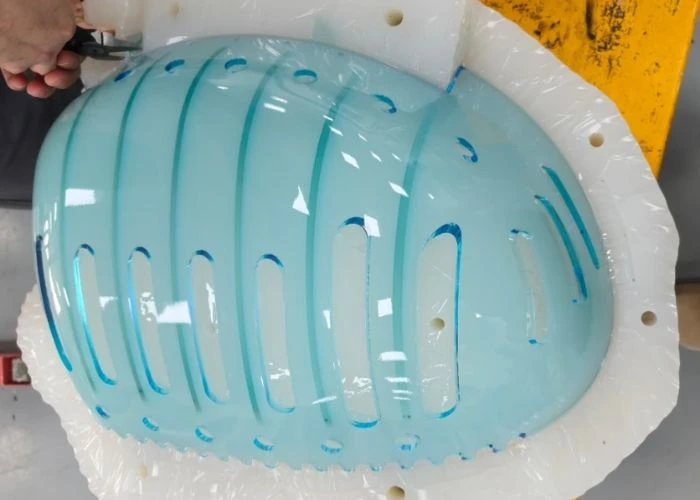
The silicone mold is one of the most important variables separating vacuum casting from other plastic prototyping processes. Gate location, vent position, parting-line planning, mold support, and mold condition all influence how resin fills the cavity and how consistently repeated parts can be produced.
Gate placement influences where resin enters the cavity and how the flow develops around the part. The objective is not simply to place a gate where it is convenient to cut away later; it should also support predictable filling while considering the visible surfaces of the prototype.
Vents become particularly important around flow-end regions, blind areas, sharp directional changes, and features where air can accumulate. Formlabs similarly recommends placing vents where air is likely to become trapped because retained bubbles create voids in the finished casting.
Parting-line placement affects both mold construction and the visible condition of the casting. Whenever possible, I prefer to consider where trimming marks or light flash will be least disruptive to important cosmetic and assembly surfaces.
Mold condition also changes with repeated casting. Silicone molds progressively deteriorate through exposure to casting resins, and research has linked this deterioration to changes in surface condition and increased difficulty during demolding.
I therefore do not treat silicone mold life as one fixed number. Geometry, undercuts, resin system, demolding stress, surface detail, and required quality can all determine when a mold should be replaced.
Process Control Helps Prevent Vacuum Casting Defects
Most defect prevention happens through a sequence of manufacturing controls rather than one corrective action. In my work, I treat master preparation, mold planning, resin handling, casting, curing, demolding, and inspection as connected stages because a weakness in one stage can appear as a defect much later.
Before casting begins, I first look at the master pattern and silicone mold. Important surfaces should be clean and stable, and gates and vents should match the geometry being filled. Any master pattern defect that should not appear on the final prototype should be addressed before mold replication.
Resin preparation requires similar discipline. Mixing should follow the selected material system, entrained air should be controlled, and tools and working conditions should remain appropriate for casting. Degassing is valuable because trapped gas is a common source of voids, but it works best as part of a broader process rather than as a standalone solution. Formlabs also highlights degassing as a practical method for managing trapped bubbles in casting systems.
During curing, adequate time and controlled conditions help the casting reach a more stable state before removal. Demolding too early can place unnecessary stress on thin walls, large surfaces, or other deformation-sensitive structures.
After demolding, hand finishing should correct removable manufacturing traces such as gates or light flash without hiding defects that require process correction. If the part later needs painting or another cosmetic finish, I prefer to address the underlying surface condition before coating rather than depend on paint to conceal it.
Defect Prevention Must Continue Across a Low-Volume Prototype Batch
Vacuum casting is often chosen when several similar prototype parts are required, so producing one acceptable first part is not enough. I also consider whether the silicone mold and casting process can maintain suitable quality throughout the quantity required for the project.
The first acceptable casting provides an important reference. It can be used to check visible surfaces, critical dimensions, local deformation, trimming requirements, and assembly fit before the remaining batch is completed.
As additional castings are produced, I look for changes rather than inspecting each part in isolation. Increasing flash, loss of fine detail, changes in surface texture, mold tearing, or increasing demolding resistance may indicate that the silicone mold is beginning to deteriorate.
This is particularly important for parts that later form a complete prototype assembly. Small differences distributed across several housings or panels can accumulate and become visible as inconsistent gaps or alignment once the product is assembled.
For me, defect prevention in vacuum casting therefore means more than producing one good sample. It means maintaining acceptable appearance, dimensions, and assembly consistency across the quantity the customer actually needs.
Vacuum Casting Quality Control at UForProto
As a direct plastic prototype manufacturer, we manage vacuum casting as part of a broader prototype manufacturing workflow rather than as an isolated molding operation. This gives me visibility into the relationship between the master pattern, casting surface, finishing requirements, and final prototype assembly.
Depending on the project, a master pattern may be produced through CNC plastic machining or 3D printing before silicone mold making begins. The appropriate route depends on the geometry, required surface condition, and prototype objective rather than following one fixed method.
After casting, we can continue with hand finishing, appearance inspection, painting, silk screening, other suitable surface finishing, and prototype assembly when required. Because these stages are connected, issues that could affect a later cosmetic surface or assembly interface can be considered earlier in the manufacturing process.
For engineers and purchasing teams, this coordinated approach helps make quality requirements clearer before production begins. Customers can send CAD files, expected quantities, surface requirements, critical dimensions, and assembly information so the project can be reviewed before vacuum casting starts.
Conclusion
Vacuum casting defects are rarely caused by one isolated step. Bubbles, incomplete filling, warpage, sink marks, flash, and surface imperfections can develop from the combined effects of part geometry, master pattern quality, silicone mold design, resin preparation, curing, and repeated mold use. Effective defect prevention therefore starts before the resin is poured and continues through demolding, inspection, finishing, and batch production. For engineers, the most important question is not simply whether a defect is visible, but whether it affects the prototype’s intended appearance, dimensions, assembly, or evaluation. By controlling the complete manufacturing chain and monitoring consistency across multiple castings, vacuum casting can provide reliable plastic prototypes for product development. You can send your CAD files and project requirements to UForProto for manufacturing review and quotation.
FAQs
1. What Are the Most Common Vacuum Casting Defects?
Common vacuum casting defects include bubbles, internal voids, incomplete filling, sink marks, warpage, flow marks, flash, surface imperfections, and defects associated with silicone mold deterioration.
2. Why Do Bubbles Still Appear During Vacuum Casting?
Vacuum processing reduces trapped air but does not automatically eliminate it. Resin mixing, insufficient degassing, poor venting, moisture, geometry, and air traps inside the mold can still produce bubbles or voids.
3. Can Vacuum Casting Defects Affect Prototype Assembly?
Yes. Warpage, dimensional deviation, incomplete features, or excessive flash around mating areas may affect gaps, alignment, fastening, and the overall fit between prototype components.
4. Can Silicone Mold Wear Cause Vacuum Casting Defects?
Yes. Silicone molds gradually change with repeated exposure to casting resins and demolding. Mold deterioration can influence surface reproduction, fine details, flash formation, and consistency across a prototype batch.
5. Can Vacuum Casting Defects Be Completely Eliminated?
No manufacturing process can reasonably guarantee that every possible defect will be eliminated. However, proper mold planning, venting, resin preparation, curing control, inspection, and mold monitoring can significantly reduce defect risks.
6. What Information Should I Provide for a Vacuum Casting Project?
I recommend providing 3D CAD files, required quantities, material or performance expectations, color requirements, surface finishing specifications, critical dimensions, and relevant assembly information.