
Plastic molding includes several manufacturing processes used to shape plastic into finished or semi-finished products. Depending on the process, manufacturers may use a mold cavity, die, heat, pressure, vacuum, or rotation to create the required geometry. For engineers and purchasing teams, choosing the right method depends on more than part shape. Material behavior, production volume, dimensional requirements, surface quality, and tooling investment also matter. In this guide, I explain the major molding processes and what should be considered before a design moves toward production tooling.
What Is Plastic Molding?
Plastic molding is better understood as a family of plastic manufacturing processes rather than one specific technique. Different methods shape plastic in different ways, but they share the same broad objective: converting plastic material into a controlled physical geometry that can be produced consistently.
In injection molding, for example, molten polymer is injected under pressure into a closed mold cavity. Thermoforming begins with a plastic sheet that is heated and formed against a tool, while rotational molding uses heat and rotational movement to distribute material inside a hollow mold.
This distinction matters because the term does not describe one universal machine or workflow. The U.S. EPA similarly treats plastics molding and forming as a broad manufacturing category that includes molding, extrusion, thermoforming, casting, coating, and other processes used to produce intermediate or final plastic products.
How Does the Plastic Molding Process Work?
There is no single plastic molding process that represents every method. However, most processes involve preparing the material, bringing it into a form that can be shaped, controlling the geometry with tooling, stabilizing the material, and then removing or continuously producing the finished shape.
For thermoplastics, heat commonly softens or melts the polymer before forming. Thermosetting systems behave differently because chemical curing may become part of the process. Material preparation can also include drying, blending, coloring, or controlling additives before forming begins.
The shaping mechanism then depends on the process. Injection molding uses pressure to fill a mold cavity; blow molding expands a softened plastic form with air; compression molding presses material between tool surfaces; thermoforming shapes heated sheet; and extrusion continuously forces material through a die.
Understanding this difference is more useful than memorizing one generic molding sequence, because the way material is shaped affects geometry, tooling, tolerances, surface quality, production economics, and potential manufacturing defects.
What Are the 7 Main Types of Plastic Molding?
Plastic molding includes several processes that differ in how the material is shaped, what geometry they can produce, and how much tooling they require. Injection molding, blow molding, compression molding, rotational molding, thermoforming, extrusion, and vacuum forming cover many common production needs, but they are not interchangeable.
Before looking at each process, I find it more useful to compare their manufacturing roles directly. The table below provides an initial reference rather than a fixed process-selection rule, because actual capability still depends on material grade, geometry, tooling, quality requirements, supplier equipment, and production volume.
Plastic Molding Process Comparison
| Process | How It Forms the Part | Best For | Typical Materials | Production Role |
| Injection Molding | Molten plastic is injected into a closed mold | Complex 3D parts, housings, clips, bosses | ABS, PP, PC, PA, POM | Repeated medium–high-volume production |
| Blow Molding | Air expands softened plastic inside a mold | Bottles, reservoirs, hollow containers | PE, PP, PET | Repeated hollow-part production |
| Compression Molding | Material is compressed between heated tool surfaces | Larger parts and composites | Thermosets, composites | Medium–high-volume production |
| Rotational Molding | Heated material coats a rotating hollow mold | Tanks, large containers, hollow shells | Mainly PE | Large hollow products |
| Thermoforming | Heated plastic sheet is formed over or into a tool | Trays, covers, panels, packaging | ABS, PS, PETG, PP | Sheet-based production |
| Extrusion | Softened plastic is continuously pushed through a die | Tubes, profiles, seals, sheet | PE, PP, PVC, ABS | Continuous production |
| Vacuum Forming | Vacuum pulls heated sheet against a tool | Covers, trays, shallow shells | ABS, PETG, PS | Sheet-based low–medium-volume parts |
The most important difference is therefore not simply cost. Each process starts with a different material condition and controls geometry differently. A detailed housing, hollow bottle, continuous tube, and large tank may all be plastic products, but their geometry naturally points toward different manufacturing processes.
1. Injection Molding
Injection molding heats thermoplastic material and injects the molten polymer under pressure into a closed mold cavity. After filling, packing, and cooling, the mold opens and the finished part is ejected. It is especially useful when complex three-dimensional geometry needs to be reproduced consistently.
Housings, ribs, bosses, clips, connectors, mounting features, and other details can often be integrated into a single molded component. This integration is one reason injection molding is widely used for consumer electronics, medical products, automotive components, and industrial plastic parts.
The trade-off is production tooling. Mold design and construction require greater upfront commitment, while the part itself must account for draft, wall design, gates, cooling, shrinkage, and ejection. The economics therefore become more attractive when the design is sufficiently mature and the required production quantity can justify the tooling.
2. Blow Molding
Blow molding is primarily used for hollow plastic products. A heated tube or preform is placed inside a mold, and compressed air expands the softened material outward until it conforms to the mold surface.
This makes the process suitable for bottles, containers, reservoirs, and certain tanks. Compared with injection molding, its main manufacturing advantage is not greater geometric complexity but the ability to create an enclosed hollow volume efficiently.
3. Compression Molding
Compression molding places a measured amount of material into a heated mold and applies pressure between the tool surfaces. Heat and pressure cause the material to flow into the required shape before it cures or stabilizes.
I commonly associate the process with thermosetting materials and composites, particularly for larger or relatively straightforward components. It does not rely on the same high-pressure cavity-filling mechanism used in injection molding, so its design and material considerations are different.
4. Rotational Molding
Rotational molding places plastic material inside a hollow mold that is heated while rotating around multiple axes. As the material softens, it gradually coats the internal mold surface and forms a hollow component.
The process is commonly associated with large tanks, containers, hollow housings, and outdoor products. It can produce large hollow geometry without the injection pressures required by injection molding, although cycle time, wall control, and dimensional expectations are different.
5. Thermoforming and Vacuum Forming
Thermoforming begins with a plastic sheet that is heated until formable and then shaped over or into a tool. Vacuum forming is one variation of this process, using vacuum pressure to pull the heated sheet against the tool surface.
These processes are commonly used for trays, covers, packaging, panels, and relatively large thin-shell components. Tooling can be simpler than injection molding, but deep draws, wall thinning, trimming, and dimensional control become important design considerations.
For prototype buyers, vacuum forming should not be confused with vacuum casting. Vacuum casting uses a master pattern and silicone mold to reproduce cast resin parts, while vacuum forming reshapes heated thermoplastic sheet over a forming tool.
At UForProto, vacuum casting is part of our plastic prototyping capability; we do not provide it as or describe it as vacuum forming.
6. Extrusion
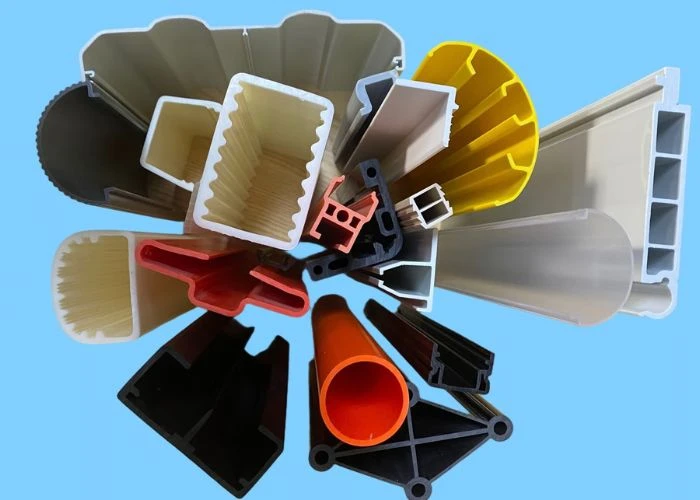
Extrusion is often discussed alongside plastic molding, although technically it differs from cavity-based molding. Instead of producing individual parts inside a closed mold, softened polymer is continuously pushed through a die that defines the cross-section.
This produces continuous products such as tubing, pipe, seals, profiles, and sheet. The part length can change while the basic cross-sectional geometry remains consistent, which makes extrusion fundamentally different from processes that create one discrete molded part per cycle.
What Materials Are Used in Plastic Molding?
Material selection affects more than final part properties. In plastic molding, the polymer also influences processing temperature, flow, shrinkage, moisture control, cooling, surface quality, and sometimes the tool itself. I therefore evaluate material and manufacturing process together rather than as independent decisions.
Common thermoplastics include ABS, polypropylene (PP), polyethylene (PE), polycarbonate (PC), nylon (PA), POM, polystyrene (PS), PET/PETG, and flexible materials such as TPE or TPU. However, not every material is equally appropriate for every molding process.
For injection molding alone, current material-selection guidance identifies mechanical requirements, operating temperature, chemical exposure, cosmetic requirements, and cost as major selection factors. It also notes that resin choice can affect mold material, cooling, and pre-drying requirements.
For an engineer, this means that selecting “PP” or “ABS” on a drawing is only part of the manufacturing definition. Grade-specific properties may matter when flame performance, impact behavior, chemical resistance, thermal requirements, flexibility, or regulatory conditions are important.
What Are the Advantages and Limitations of Plastic Molding?
The main value of plastic molding appears when the selected process matches the geometry and production requirement. It can produce repeatable parts efficiently, integrate features into one component, reproduce controlled surfaces, and reduce unit manufacturing cost when tooling is spread across sufficient production volume.
Injection molding demonstrates this particularly well. Once the mold and process are established, ribs, bosses, clips, openings, textures, and mounting features can be repeatedly produced without separately machining each feature. This is one reason molded plastic is common across consumer, medical, automotive, and industrial products.
The limitation is that low unit cost does not necessarily mean low project cost. Tooling requires initial investment and time, and changes after mold construction can affect cost and schedule. Molding also introduces process-specific concerns such as shrinkage, warpage, sink, weld lines, filling behavior, and ejection.
For one-off prototypes or early designs that are still changing, production tooling may therefore be economically premature even when molding is clearly the intended final production method. This is where development stage becomes as important as production volume.
What Products Are Made With Plastic Molding?
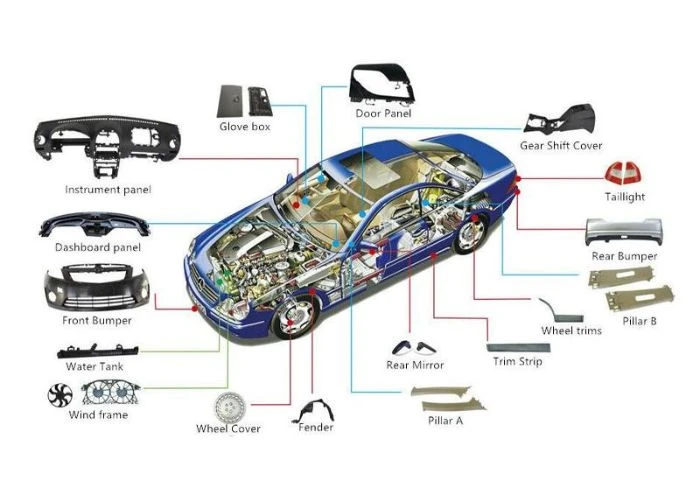
Plastic molding supports products across electronics, medical devices, automotive systems, packaging, consumer goods, industrial equipment, construction, and household products. The EPA likewise identifies automobiles, appliances and electronics, construction materials, household products, and medical products among markets served by plastics molding and forming.
From an engineering perspective, however, I find product geometry more useful than the industry name when discussing the process. An electronic housing and an automotive enclosure may both suit injection molding if their geometries and production requirements are similar.
A bottle or reservoir naturally points toward blow molding; a large hollow tank may favor rotational molding; a continuous tube or profile points toward extrusion; and a large tray or thin cover may be more naturally associated with thermoforming or vacuum forming.
This is why I would not choose a plastic molding process simply because it is common in a particular industry. The geometry, material, quality requirement, quantity, and manufacturing economics still need to support the choice.
How Should Engineers Choose the Right Plastic Molding Process?
Choosing the right plastic molding method is a constraint-matching exercise. Current engineering guides repeatedly identify geometry, material, production volume, tolerance, surface finish, tooling cost, and quality risk as key factors. I would add design maturity because it determines whether production tooling is appropriate yet.
I normally start with geometry. A hollow container, continuous profile, shallow sheet shell, large hollow tank, and detailed three-dimensional housing already point toward different process families. Geometry can eliminate unsuitable methods before detailed costing begins.
Material then narrows the options further. The selected polymer must suit the process while meeting the finished product’s mechanical, thermal, chemical, cosmetic, and regulatory requirements. Production quantity determines whether the required tooling investment makes economic sense.
Finally, I consider design maturity. A project can have an obvious future production process and still be too early for production tooling. If the team is still changing physical proportions, interfaces, assembly relationships, or product interaction, those uncertainties deserve attention before the mold becomes the expensive part of the revision cycle.
Why Should a Plastic Part Be Validated Before Production Tooling?
Selecting the future manufacturing process and validating the product are related but different decisions. Before production tooling, I want enough physical evidence to understand whether important geometry, interfaces, assembly relationships, appearance, and material-dependent behavior support the intended product.
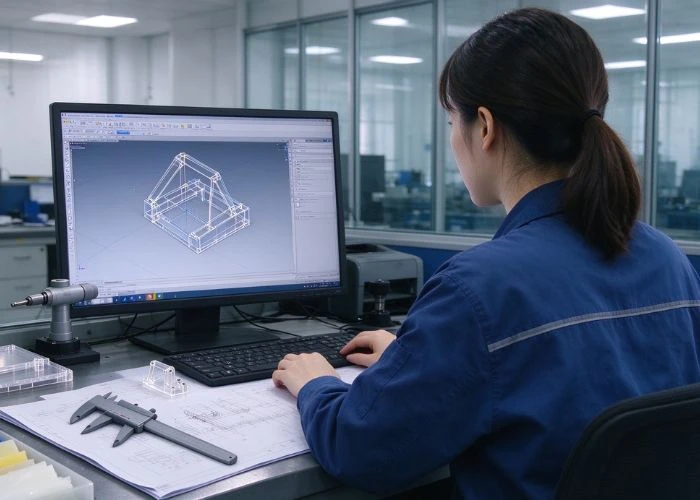
A CAD model is extremely useful for design development, but some questions become clearer only when a physical part exists. Engineers may need to handle an enclosure, install actual components, check access around a connector, compare visible surfaces, or evaluate how multiple parts interact.
Finding one of these issues before tooling does not mean the original CAD was poor. Physical validation is part of turning digital intent into a product. It provides another form of engineering evidence before changes become connected to a dedicated production tool.
A Moldable CAD Model Is Not Always a Validated Product Design
Molding DFM and physical product validation answer different questions. A DFM review can determine whether geometry is compatible with the intended manufacturing process. A prototype helps determine whether the physical design provides the fit, interaction, appearance, and behavior the development team expects.
For injection molding, a design may have acceptable draft, wall thickness, ribs, bosses, and undercut strategy. Those are important manufacturing considerations. They do not automatically tell me whether a button feels correctly positioned, an enclosure proportion looks right, or an internal component can be installed conveniently.
I therefore separate moldability from product validation. Moldability asks whether the intended process can manufacture the geometry. Physical validation asks whether the current physical design gives the engineering team enough confidence to continue toward production.
How Should Engineers Choose a Prototype Before Plastic Molding?
Before production tooling, I choose a prototype according to the engineering question that still needs an answer rather than simply selecting the fastest manufacturing process. A prototype used to check geometry does not need to represent the same characteristics as one intended to evaluate material behavior, assembly, or final appearance.
For early physical validation, the first question is usually how closely the prototype needs to represent the intended product. If the team mainly needs to evaluate overall size, component packaging, openings, access, or physical proportions, a fast prototype can provide useful evidence without reproducing the future plastic molding process. At this stage, forcing the prototype to behave exactly like a molded production part may add cost without improving the decision being made.
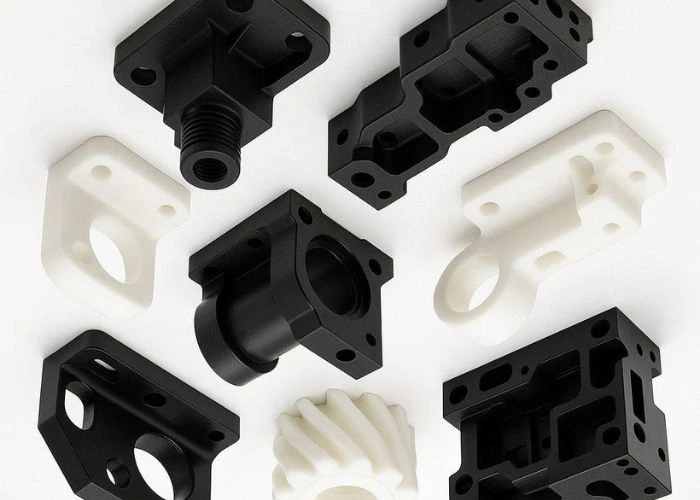
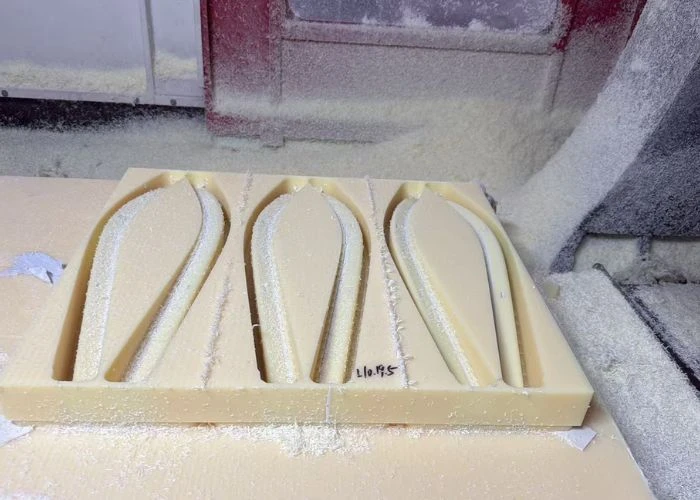
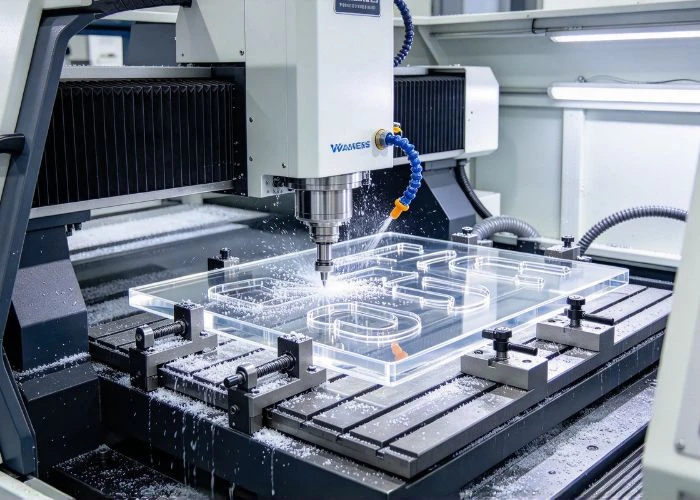
When material behavior becomes part of the question, the manufacturing route needs more consideration. CNC plastic machining can manufacture parts directly from engineering-plastic stock such as ABS, PC, PMMA, POM, PP, PA, and other available materials. I use this route when actual thermoplastic behavior, controlled geometry, fastening features, or physical interfaces matter more than simply producing the shape quickly.
SLA or SLS 3D printing serves a different purpose. It can shorten the path from CAD to a physical part when geometry is changing quickly or when complex structures would be inefficient to machine. However, I do not assume that a printed resin or powder-based part automatically represents the mechanical behavior of the intended molded thermoplastic. The value of the prototype depends on whether that difference matters to the question being tested.
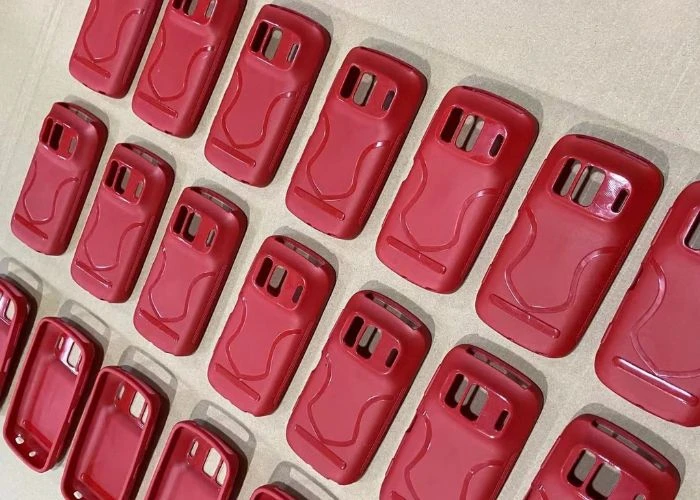
When several similar parts are needed for assembly evaluation, customer presentation, or a low-volume prototype build, vacuum casting can provide another route. Surface finishing and prototype assembly can then be added when color, graphics, visible gaps, component interaction, or the appearance of the complete product needs to be evaluated. In our plastic prototyping work, these processes are often combined because one prototype may need to answer more than one development question.
The important boundary appears when the engineering question changes from product design to the molding process itself. A machined, printed, or vacuum-cast prototype can provide valuable physical evidence, but it cannot reproduce every condition created inside an injection mold. If the team needs to evaluate production resin under actual molding conditions, gate effects, molded shrinkage, weld lines, ejection, or other process-dependent behavior, molded samples or prototype tooling may be required before final production tooling. Prototype-tooling guidance similarly distinguishes early geometry and fit learning from validation that specifically requires actual molded parts.
For me, the right prototype before plastic molding is therefore not the one that imitates the final process most completely. It is the one that provides enough physical evidence to support the next engineering decision without claiming to validate characteristics that its manufacturing process cannot reproduce.
What Can a Prototype Not Predict About Plastic Molding?
A physical prototype can reduce product-design uncertainty, but I do not treat it as a substitute for molding-process validation. Manufacturing a part by CNC machining, 3D printing, or vacuum casting creates a different process history from producing the same geometry in a production mold.
For example, a CNC-machined ABS part can provide real ABS material and accurate physical geometry, but it cannot reproduce mold filling, gate effects, weld lines, injection-related shrinkage, ejector behavior, or every residual-stress condition associated with an injection-molded ABS component.
Similarly, a painted prototype can provide strong evidence about color and overall cosmetic intent without necessarily predicting how a production mold texture will reproduce across thousands of molded parts.
This boundary is important. Plastic prototyping should answer the development questions it was designed to represent, while the molding supplier later validates the tool, process window, filling behavior, cycle, and production consistency.
When Is a Design Ready to Move Toward Plastic Molding?
There is no universal prototype count that makes a product ready for molding. I look instead at whether the important product uncertainties have been reduced enough that the remaining questions are increasingly related to tooling and production engineering rather than unresolved physical product design.
The geometry should be sufficiently mature for the intended production process, critical interfaces should be understood, assembly decisions should be reasonably stable, and the material and cosmetic requirements should be defined well enough for production suppliers to evaluate them.
This does not mean every question has disappeared. Tool trials and production validation still exist for a reason. It means that major product-level uncertainties are less likely to force avoidable redesign after tooling has already been committed.
How We Support Product Development Before Plastic Molding
Our role at UForProto is on the physical prototype side of product development. We are a direct plastic prototype manufacturer in China rather than a trading company, and we manufacture prototype parts before customers commit their designs to later production processes.
Our capabilities include CNC plastic machining, SLA/SLS 3D printing, vacuum casting, surface finishing, and complete prototype assembly. Depending on the project, these processes can be used individually or combined to support functional, cosmetic, assembly, and low-volume prototype builds.
We do not provide injection molding. When a customer’s future production plan involves injection molding or another plastic molding process, our role is to help manufacture and evaluate the physical prototype before production tooling is committed.
For project review, engineers, R&D teams, designers, and purchasing teams can send us CAD files, drawings, material requirements, quantities, surface requirements, and prototype objectives. We use that information to evaluate the appropriate prototype manufacturing route and prepare a quotation.
Conclusion
Understanding plastic molding is not only about knowing how different processes shape plastic. For engineers, the more important decision is whether the selected process matches the part requirements and whether the design is mature enough for production tooling. Material, geometry, production volume, and manufacturing requirements all influence that decision, while physical prototypes can provide valuable evidence before tooling is committed. As a direct plastic prototype manufacturer, UForProto supports this earlier development stage through CNC plastic machining, 3D printing, vacuum casting, finishing, and prototype assembly. You can send us your CAD files and project requirements for manufacturing review and quotation.
FAQs
1. What Is Plastic Molding?
Plastic molding broadly refers to processes that shape plastic material into a required physical form using molds, dies, heat, pressure, vacuum, rotation, or related forming methods. It includes several distinct manufacturing processes rather than one universal production method.
2. What Are the Main Types of Plastic Molding?
Common processes include injection molding, blow molding, compression molding, rotational molding, thermoforming, extrusion, and vacuum forming. Other specialized processes also exist, so there is no single definitive number of plastic molding and forming methods.
3. What Is the Most Common Plastic Molding Process?
Injection molding is one of the most widely used processes for repeat production of detailed three-dimensional plastic components. It is particularly relevant to housings, clips, bosses, connectors, gears, and other parts that combine complex geometry with repeatability.
4. What Materials Are Commonly Used in Plastic Molding?
Common materials include PP, ABS, PE, PC, PA, POM, PS, PET/PETG, TPE, and TPU, although compatibility depends on the molding method and specific grade. Material requirements should also reflect mechanical, thermal, chemical, cosmetic, and regulatory conditions.
5. How Do I Choose the Right Plastic Molding Process?
I would start with part geometry, then evaluate material compatibility, production quantity, dimensional requirements, surface finish, tooling investment, secondary operations, and quality requirements. A hollow tank, continuous profile, shallow sheet shell, and detailed housing naturally lead toward different manufacturing processes.
6. Should I Build a Prototype Before Plastic Molding?
A prototype is particularly useful when important physical design questions remain before production tooling. It can help evaluate geometry, component packaging, interfaces, appearance, assembly, or material-related behavior. The appropriate prototype process depends on which of those questions the development team needs to answer.